Ovate Rifle Barrel From Full Round Blanks
This article about preparation of rifle barrel blanks to create an ovate rifle barrel for a Martini rifle project first appeared in the Spring 2015 edition of “Gunmaker-Journal of Custom Gunmaking” magazine. The American Custom Gunmakers Guild is a non-profit organization dedicated to preserving the art of fine custom gunmaking. Associate membership is available to anyone and professional membership is available to associate members that have achieved peer recognition for achieving the organization’s standards of finest gunmaking.
By Dennis Daigger
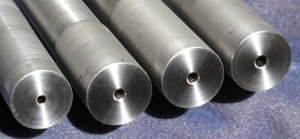
This is Part 1 of a 2-part article about the barrels for a multi-barrel Model 6 BSA takedown Martini rifle project. In Part 1 I describe what was required to get the barrel blanks ready for CNC profiling and in Part 2 the profiling process.
What began as a straight forward project just involving me to build a .17 HMR rifle on a BSA Model 6 Martini action took a turn to the complex when I met Morris Melani last year. I went to his Big Lake shop to buy a set of his quick detachable CZ style rings for a Satterlee actioned .404 Jeffery rifle that I was completing and in passing told him about the Martini project. I had the action and wood and a Lothar Walther profiled barrel was on order. I expected to have the project done in a few months.
Morris has been interested in creating ovate barrels with his HAAS CNC for some time and he offered to collaborate in the project by creating such a barrel for me from a full round blank if I got one. This would be the catalyst for his development of the Mastercam CAD/CAM solids, design and development of the CNC fixtures and the actual creation of an ovate barrel by CNC.
The action I have is a takedown and a multi-barrel rifle eventually evolved in our conversations. I acquired four barrel blanks, and an additional breach block (calibers include rimfire and centerfire) and then it turned into Morris’ show.
This article will chronicle the steps preparatory to the CNC milling. Full aspects of the project are chronicled at Morris’ web blog, http://blog.alaskaarmsllc.com/ovate-barrels-part-1/, for those interested in the entire project.
In addition to the .17 HMR I chose other chamberings of personal interest. Ballistic characteristics of these cartridges are quite different and I wanted a tailored sight configuration for each barrel. The Mastercam CAD/CAM produced solids would have slight variations to accommodate the following configurations:
|
Cartridge |
Primary Sight |
Secondary Sight |
| .17 HMR | 6X Unertl Small Game Scope | None |
| .22 LR | BSA Peep sight, front globe | Scope bases |
| 5.6X50R | 10X Fecker Scope | Flip up front, standing rear |
| .25-20 WCF | Standing rear, Beach front | Scope bases |
My specifications were simply: 26” final barrel length; integral target bases; longitudinal front dovetail that would accommodate Recknagel blades; and; an integral bottom lug for attaching the forearm.
With the exception of the inordinately well finished Lothar Walther 17 caliber 1.250” diameter blank, the other blanks were very rough and needed a lot of work.
Two of the barrels had not been rough turned on the exterior and these not only had significant rust on them but the bores were noticeably off center in the full round blanks as was the third one which had been rough turned. All had bores that were remarkably straight so work on them proceeded.
Morris set the barrels up on the lathe on centers and carefully trued a section on each end of the blank to be concentric with the bore. Very precise tolerances were maintained for this operation. As each barrel was held between centers very light skim cuts were performed on it until the outside was trued to the axis of the bore.
Using the trued section on the breach end of each barrel as a reference point the overall length was brought to 26”.
Morris describes the process for standardizing the barrel length:
“After the shortest barrel had been faced and had centers cut on both ends, I stood it on end on the surface plate. The other three barrels were faced on one end and I stood each, one by one, next to the first and used a depth mic to determine the amount to shorten each to achieve a standard length. This resulted in all barrels being within .005” of the standard length.”
Each barrel was crowned at the breach and the muzzle. Again, Morris’ description:
“Total run out with the barrels chucked in the 4 jaw was .0002”. The ends of each blank were faced and a 60 degree center was cut in the end using a boring tool feeding the tool from the bore out to draw burrs out of the barrel. The barrels were next placed between centers with the tailstock pressure only and a 2” section was turned concentric with the bore. After this step it was possible to chuck one end of the barrel in the 4 jaw and indicate both ends of the barrel. A steady rest was then used to support the barrel and the entire outside was turned concentric with the bore.”
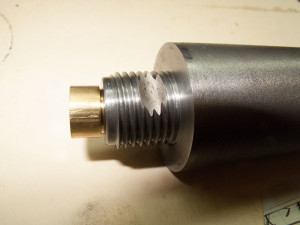
The action barrel tenon was cut on each barrel and this tenon was threaded using a 55 degree tool. The Martini uses 55 degree Whitworth threads. The leading edge of the tool was rounded manually to produce the appropriate Whitworth thread profile.
Morris’ description:
“A 55 degree threading tool was ground on the surface grinder with a half thread width feed side that allowed the thread to be machined to the shoulder eliminating the relief cut and allowing threads to be turned to the shoulder adding strength to this critical area.”
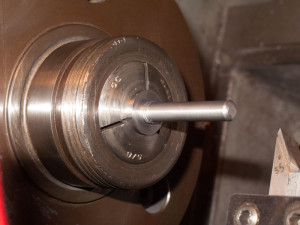
Morris previously made a tool fixture for cutting the threading tools using the surface grinder. This is a very precise fixture that gives extraordinarily consistent tools. Because this one is set up for cutting a 60 degree angle a sine plate was needed to reduce the angle to the required 55 degrees.
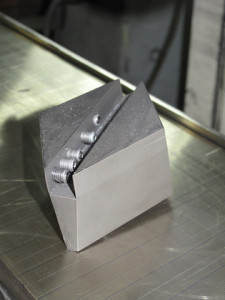 Grinding fixture for thread cutting tools
Each barrel was then threaded to give a consistent snug turn-in to the action face. With this takedown system using four barrels it is important to have precise tolerances from barrel to barrel.
Finally, each barrel was chambered using a floating reamer holder in the tail stock. Morris’ description:
“The chambers were cut to a feel on the go gauge +.001 shim stock. The chamber reamers were removed as soon as the dry chips emerged from flutes. The reamer was then withdrawn, cleaned and thoroughly oiled. Several dry patches were run through the bore. The reamer and copious amounts of oil were reinserted and the entire process restarted.”
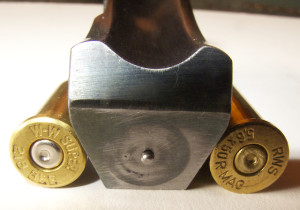
Each barrel was screwed into the receiver with its appropriate breach block installed and firing tests were conducted to ensure primer ignition. Because the head diameters of the .22 LR and the .17 HMR are slightly different I had some concern about whether the rimfire block firing pin location set up for the .22 LR would detonate both the .22 LR and the .17 HMR cartridges. Both the rimfire and centerfire tests resulted in detonation and the conclusion is that no adjustment to the location of the rimfire firing pin is needed.
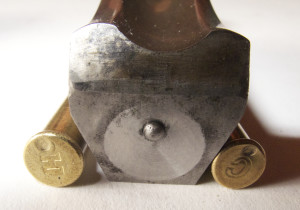 Center fire and rim fire test results
Before the barrels can have ovate profiles cut for this project the take down system groove through the lower part of the barrel threads needs to be cut on each barrel.
The BSA Martini takedown system consists of a tapered screw that passes through the action from left to right perpendicularly to the axis of the bore. The taper of the pin mates with the cut on the underside of the barrel threads and as the pin is screwed into the action the first thing that happens as the screw taper engages this barrel cut is that the barrel is rotated into the top dead center position until the screw surface and the barrel surface are fully mated. As the screw is fully tightened the barrel is pressed firmly upwards into the upper parts of the action threads ‘locking’ the barrel to the action. There is nothing particularly sophisticated about this system but having studied some of the other British takedown systems it is as svelte and reliable as anything I’ve seen.
The problems associated with implementing this system on a four barrel project were evident. First, how to use a common pin for all of the barrels. Multiple barrel-specific parts present a problem because if something is lost, the efficacy of the system is diminished. Two breach blocks and four extractors would be needed already and I did not want any more duplication of parts. I wanted to use a lever on the takedown pin that would index straight down when torqued in for each barrel. A lever would afford the luxury of not having to have a screw bit readily available for barrel change outs. Morris thought that EDM gave the best opportunity to control this part of the project precisely through four iterations.
The takedown screw was secured in the vise of an optical comparator and the taper of the pin was established as 4 degrees.
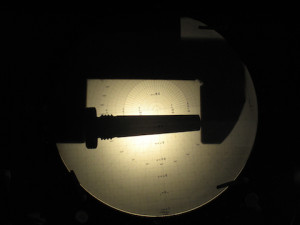 Takedown pin on optical comparator
I had rough turned takedown screw blanks out of O-1 tool steel and Morris brought two to near final dimensions on the lathe and threaded each. The taper would be ground with the surface grinder after the profiles had been cut.
Graphite rods 5/16” in diameter were then secured in a Harig jig and dialed in. This set up was moved to a sine plate setup to give the appropriate 4 degree taper. Using the surface grinder, four EDM electrodes were cut that precisely duplicated the profile of the takedown screw.
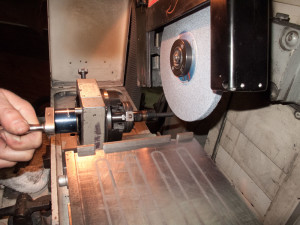 Grinding EDM Electrode at 4 Degrees
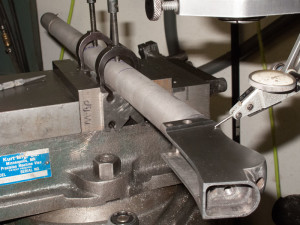
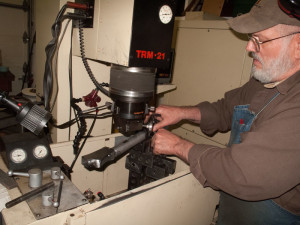
To reduce the EDM time needed to cut the groove in the bottom of the barrel threads the barrels were placed on two V blocks and loosely secured. This setup was moved to the mill, the action was screwed to the barrel with the slightest snug up. The setup was then dialed in using the side of the action. The sides of the action had previously been precisely surface ground to the thickness of plus or minus .002”. Once dialed in and secured in the fixture a 3/16” end mill was centered in the takedown screw hole, the action was removed and a rough groove was cut through the threads.
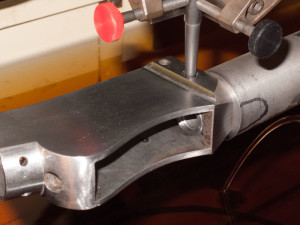
A second mill cut was done while the barrel was secured in this setup. A 3/4” x 1 1/2” section of the barrel about 4” forward of the action was milled. This flat on the left side is 90 degrees left of top dead center for the barrel and will be used for verifying the dial-in in the CNC barrel set up and later in dialing in the barrel in the CNC fixture.
A reliable method of controlling the depth of the EDM cut needed to be established and this was done by screwing the original takedown screw tightly into the action. The action was then set up on the surface grinder and the head of the screw was ground flat. The original BSA barrel from the action was then screwed in, the takedown pin was screwed in and brought up tight and then backed out ½ turn. The width of the action from the right side to the top of the screw head on the left was measured and this would become the desired depth for the EDM cut.
The barrel still secured in the V block fixture was then moved to the EDM where the tapered electrode was installed. The side of the action was dialed in and the mill-cut flat on the barrel (can be seen in this photo) was used for a cross check verification.
The setup was then secured, rechecked and then the takedown pin hole was positioned under the electrode. The electrode was lowered so that it could be brought into contact with the threaded portion of the barrel and by alternately touching off in the X and then the Y axis the center position was established for the center of the pin.
The action was unscrewed from the barrel and the EDM process was sequentially completed for all four barrels.
Checks were made periodically to gauge depth progress by raising the electrode, screwing the action into the barrel, screwing the takedown pin in and finally measuring the width from the top of the pin head to the opposite side of the action. The final result looks very good and is quite repeatable to ensure tight tolerances from barrel to barrel. Light hand stoning removed the hard surface material deposited during EDM machining.
Part 2 will describe the CNC milling fixture, the setup and the results from running the Mastercam program.
Readmore

